Sunday, 11 August 2013

Chocolate fudge cake

The perfect chocolate fudge cake. You want it to be moist, fudgey, rich and chocolatey. I had been in search of this for a while, and when I finally found a good recipe, I had a chance to test it out on my brothers for their birthday. The finished result went down VERY well. The sponge doesn't even have any butter in it so it can almost be considered healthy (ha!). If you can, use a very dark cocoa powder, such as Bourneville (but Tesco does a very good imitation as well).

This recipe makes a two-layer, 7in cake.

Gather your equipment
Essential equipment:  7in cake tins, scales, mixing bowl, measuring jug, measuring spoons, fork, mixing spoon
Optional equipment: spatula, sieve
  • It is not the end of the world if you don’t sieve everything in this recipe.
  • Make sure you line your cake tins so that you can turn out your cakes easily
Gather your ingredients
For this recipe you'll need: 175g self-raising flour, 3tbsp cocoa powder, 1tsp bicarbonate of soda, 150g caster sugar, 150ml sunflower/vegetable oil, 150ml milk, 2 eggs, 2tbsp golden syrup

Prepare to bake
Preheat oven to 180°C and line your cake tins if you haven’t already. I tend to just cut out a circle of baking paper for the base, then spread a little vegetable oil around the sides.
Stir dry ingredients together
Weigh (and sift, if you have a sieve) the flour, cocoa powder, bicarbonate of soda and caster sugar straight into the mixing bowl. Stir everything together well.
Beat wet ingredients together
Measure the oil and milk in the same jug, then add the eggs and golden syrup and beat together using the fork. Make sure you scrape all the golden syrup from the bottom of the jug as it tends to stick. Also make sure the eggs have been beaten in well.
Combine wet and dry ingredients together
Make a ‘well’ in the dry ingredients, and pour in the wet. Stir well until everything is combined and smooth.
Pour into tins and bake
As soon as everything is mixed, pour the mixture into the cake tins equally. Bake for 25-30 minutes, until a skewer/toothpick inserted into the centre comes out clean. Leave to cool in the cake tins, then turn out, pick an icing, sandwich and decorate! If you're not too confident on the sandwiching step, click here for some tips.

Here, I sandwiched and topped with a chocolate fudge icing, then decorated with maltesers, oreos, rolos, reese’s peanut butter cups, chocolate covered peanuts and drizzles of chocolate:

Here, I sandwiched with a chocolate fudge icing, and topped with a dark, rich ganache:


Chocolate fudge cake: - makes a double-layer 7in cake
175g self-raising flour
3tbsp cocoa powder
1tsp bicarbonate of soda
150g caster sugar
2 eggs
150ml sunflower oil
150ml milk
2tbsp golden syrup

  1. Preheat oven to 180°C
  2. Stir together flour, cocoa powder, bicarbonate of soda and sugar
  3. Beat together oil, milk, syrup and eggs
  4. Make a well in the dry ingredients, pour the wet ingredients in
  5. Stir well until the mixture is smooth and well-combined
  6. Pour into two lined cake tins
  7. Bake for 25-30 minutes

Recipe originally from: BBC Good Food

Sunday, 4 August 2013

Sandwiching cake layers together

Here are some tips for sandwiching together cake layers. It may sound easy, but it’s not great when you end up with a completely wonky, lopsided cake with the layers sliding past each other and everything falling apart. Case in point:


This cake. I made this quite a few years ago now as you may be able to tell from the quality.
The blue icing was completely the wrong consistency, as you can probably see from the picture, so the green layer kept sliding off the purple layer (which you can’t even SEE because of the blobs of icing tipping over its side). Icing consistency was one of the many problems with this cake, the others being my lack of access to three cake pans of equal size, and a lack of adequate food colourings. Something which was NOT a problem was the taste, but even still this experience put me off any further attempts at a rainbow cake. Perhaps in the future I will return to this challenge.


But anyway, here, I hope I can give you some tips to avoid common problems when sandwiching layer cakes together.


Firstly: baking
If you don’t have two (or even three, or more) equal sized cake tins, don’t worry! It is usually better to bake one taller cake and cut it in half lengthways, than to bake two different-sized cakes and try to trim one down to size. See the rough edges of the green cake above to confirm why this is a bad idea.
If you DO have two equal sized cake tins, try to fill them with equal amounts of cake batter.
Trimming/flattening
Usually, when I bake two “equal sized cakes”, they do NOT come out of the oven equal. This could be because of my dodgy oven, or because I am the worst at filling cake tins equally. If you also have this problem, choose the best out of the two to be your ‘top’ slice. Then trim the top off the other one using a breadknife, so that you have a flat surface.
Alternatively, if you want a really flat top, trim both of your cakes, and flip the top one upside down – once again giving you a flat surface!
In the picture above you can see that I have only trimmed one of the cakes (you can also see that not all of the cut-offs made it into the photo… I’m not even going to pretend that it wasn’t me who ate them). 
Secure your bottom layer in place
Always secure your cake to the cake stand! Just use a small dollop of icing as ‘glue’ – this will make things easier when you come to ice your cake; no slipping or sliding around on the cake stand.
Spread your sandwiching icing
Start by putting a great big dollop of icing in the middle of the bottom layer – use as much as you like, within reason. (If you’re using a thick icing like I have here, you can use a lot and it will still hold its shape. If you’re using a thinner, more fluid icing, you shouldn’t use too much as the top layer will be prone to slide around). 
Try to spread from the middle of the dollop, outwards, using a knife/spatula/back of a spoon. There shouldn’t be any need for the spoon to touch the outer ‘section’ of the icing – the bit that will be on show once the cake is sandwiched together – and leaving these parts of the icing untouched gives a nicer finish to the cake. Of course if you are going to cover the entire cake with icing anyway, it doesn’t matter how the edges look.
Top with the second cake
Carefully top with your second cake layer, and you’re done! It can take some practice to be able to get the top layer in the right place on the first try, but you can normally just push it into the right place if you didn't quite place it centrally the first time.

I will post at a later date about completely covering a cake in icing, as this is not easy to do neatly either. I hope this particular post was not way too obvious or patronising and that you were able to learn something from it!

Chocolate Ganache

This is a seriously rich, grown-up glaze, which gives a very smooth finish to cakes. You could also use it as a sauce, filling or topping for various puddings and pastries. Traditionally it’s made by grating or finely chopping dark chocolate, then boiling cream and pouring it over the chocolate. In the interests of time and effort, I just melt the chocolate and cream together in one bowl.

Makes enough to cover one large cake.

Gather your equipment
Essential equipment:  Mixing spoon, scales, saucepan, heatproof bowl
  • The heatproof bowl should be able to ‘sit’ on top of the saucepan, so that the water in the pan does not touch the bottom of the bowl
  • Scales are not strictly needed for this – most recipes vary the ratio of chocolate to cream needed anyway
Gather your ingredients
For this recipe you'll need: 125g dark chocolate, 150ml double cream
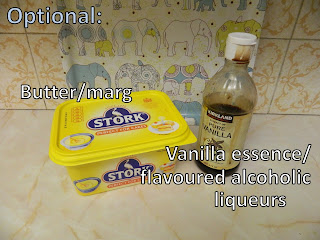
Optional: 2tbsp butter, vanilla essence, brandy/rum/flavoured liquers
  • Try to use good quality dark chocolate for this as it is the dominant flavour
  • Adding a couple of spoons of butter will make your finished ganache even smoother and glossier.
  • Vanilla essence is usually alcohol based, and other flavoured alcoholic liquers such as Kahlua, can be added for an extra flavour kick 
Prepare
Pour a little water into the saucepan, and rest the bowl on top – if the bowl touches the water, take out some of the water until it no longer touches. Start boiling your water over a gentle heat on the stove, whilst you weigh and break up your chocolate, and weigh out your cream.
Start melting your chocolate and cream together
Once the water is simmering, rest your bowl on top of the pan. Stirring occasionally, allow the cream and the chocolate to come together. This does not need constant heat – every now and again, remove the pan from the heat but keep stirring. The ingredients will soon come together to form a thick, glossy sauce.

Alternatively – microwave method!
Use a microwave to heat the double cream. Meanwhile, very finely chop your chocolate (this is why I avoid this method – I hate cutting chocolate). Once your cream has reached boiling temperature, pour it over the chopped chocolate and stir gently until everything is melted together.

Using your ganache
You can use the chocolate ganache immediately to cover cupcakes, cakes etc. and this will give quite a messy finish as the ganache will dribble down the sides of any cake you cover it with. If you don’t want to use it straight away, you can leave the ganache to cool and thicken slightly, and it will reach a spreadable consistency. Alternatively, or if you have any leftover after icing, refrigerate it for a few hours, then take teaspoons of the mixture and form them into balls using your hands – then roll them in cocoa powder/icing sugar to make some very rich truffles.

Here is a cake I made for Father’s Day, using chocolate ganache as a topping:
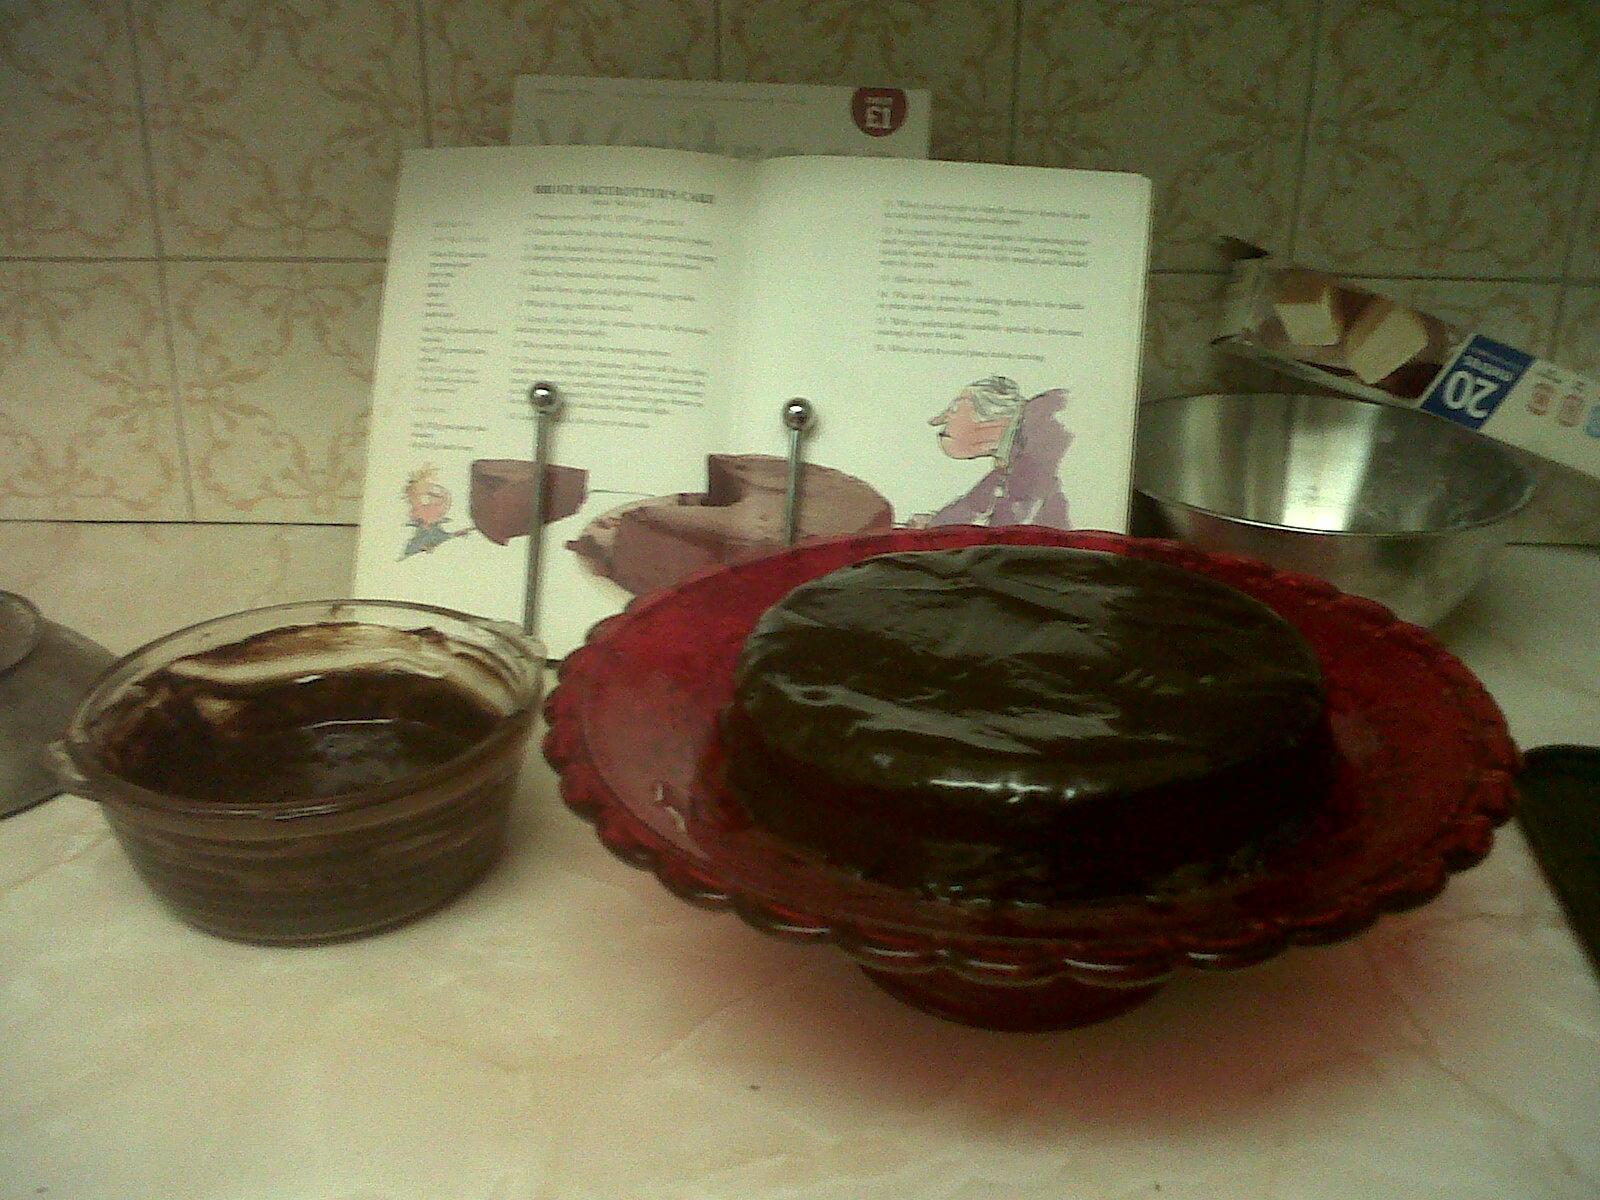
And here is the cake from whose recipe I originally stole my ganache from – the Bruce Bogtrotter cake from Matilda! This comes from the ‘Roald Dahl’s Revolting Recipes’ book and will no doubt be making an appearance on this blog at some point.


Chocolate ganache: - enough to cover one large cake
125g dark chocolate
150g double cream
Flavourings such as vanilla essence, liqueurs

  1. Melt together the chocolate and cream in a heatproof bowl set over a pan of simmering water. Stir gently until they come together to form a smooth, thick sauce
  2. Alternatively, finely chop the chocolate and pour boiling cream over. Stir gently until the ingredients come together

Recipe originally from: Bruce Bogtrotter Cake, from Roald Dahl’s Revolting Recipes

Simple chocolate fudge icing

I know I have been slacking lately in keeping up with posts, due to dodgy foreign wi-fi connections and lack of a laptop. But I will now do three back-to-back posts, which will consist of different icing recipes and techniques. They’re so simple they don’t even deserve step-by-step recipes, really, but it’s good to know a few foolproof recipes for icing. Also, these next few posts are preparation, leading up to a very special cake, for which the recipe will be available next week…

Even though this chocolate fudge icing is really easy to make, it hardens really quickly so you have to work fast. If it does harden before you can use it, you can always microwave it for a few seconds (if this softens it too much, just wait for it to harden again, or put it in the fridge for a few minutes).

This recipe makes enough to ice 12 cupcakes. Double the quantities if you want to sandwich and cover a double-layer cake.

Gather your equipment
Essential equipment:  sieve, big fork, spoon, mixing bowl, smaller microwave-proof bowl
Optional equipment: electric whisk, scales
  • Scales are optional for this recipe because you can pretty much estimate the amounts of sugar/butter/chocolate you use, according to taste.
Gather your ingredients
For this recipe you'll need: 60g butter/margarine, 120g icing sugar, 75g dark chocolate, 1-2 tbsp milk
  • If you're using butter, leave it at room temperature to soften for a few hours
Melt the chocolate, set aside
In 20 second intervals, melt the chocolate in a microwave-proof bowl, stirring each time. Once it has all melted, set aside to cool slightly. If you don’t have a microwave, use a small bowl set over a saucepan of simmering water to melt the chocolate. Make sure the bowl is not actually touching the water; the heat from the steam is enough.
Beat the butter, then add the icing sugar
Now make a normal batch of buttercream icing. Beat the butter until smooth, then sift in the icing sugar a little at a time and combine well.
Add the melted chocolate
Start off by adding small spoonfuls of the cooled melted chocolate to the icing, stirring well each time. Adding all the chocolate at once will melt the butter in the icing, so you will have to wait longer for it to cool.
Add milk
Add a small tablespoon of milk to start off with, and stir it in. Add more if necessary until the right consistency is achieved (for spreading onto cakes you want quite a smooth consistency, for piping, a less liquid icing is preferable)
Use to frost cupcakes/cakes etc.
The icing will thicken as it cools so use it immediately to frost whatever you like. This icing makes for a very good piping consistency as it thickens so quickly. I used this particular batch to sandwich a chocolate fudge cake together, which I then topped with chocolate ganache for a slightly more ‘adult’ finish:
You can also use white or milk chocolate instead of dark. The icing for the following cupcakes was made using white chocolate with some lemon curd and lemon juice added, to match the cupcakes themselves, which were a lemon sponge:


Simple chocolate fudge icing: - enough for 12 cupcakes
60g butter/margarine
120g icing sugar
75g dark chocolate
Enough milk to create desired consistency (~1 or 2 tbsp)

  1. Melt the chocolate in the microwave (or alternatively in a bowl set over a saucepan of simmering water). Set aside to cool slightly
  2. Beat together butter and sugar
  3. Add the chocolate to the icing a little at a time and stir well
  4. Add enough milk to bring the icing to a useable consistency, stir well
  5. Use immediately

Sunday, 14 July 2013

Chocolate brownies

These decadent chocolate brownies have a wonderfully crisp crust, and a deliciously fudgey middle. With very few ingredients they are quick and easy to make, but make for a very impressive dessert - serve them warm with ice cream and, if you're feeling really indulgent, a thick chocolate sauce.

Makes enough to fill a 10inx7.5in pan (roughly 20 brownies)

Gather your equipment
Essential equipment:  Lined baking tin, scales, mixing bowl, cup/glass, fork, mixing spoon
Optional equipment: Sieve, spatula
Gather your ingredients
For this recipe you'll need: 100g dark chocolate, 100g butter, 200g caster sugar, 160g self-raising flour, 2 small eggs
Optional: 50g chopped walnuts/chocolate chips, grated chocolate (for topping)
  • In this recipe I just grated 25g of dark chocolate to spread on top. You could use more, or top with chocolate chips instead.
Prepare to bake
Preheat your oven to 180°C, line your baking tin if you haven’t already, and beat the eggs in a small glass or cup.
Mix flour and sugar
Weigh your flour and sugar in the same bowl – use a sieve if you have one. Stir well, and make sure there are no remaining lumps of sugar or flour.
Melt chocolate and butter
Weigh your butter and chocolate into a microwave-proof bowl. Microwave in short 30-second bursts, stirring each time, until everything is melted together and smooth.
Stir in flour, sugar and eggs
Add the flour/sugar mixture and the beaten eggs at the same time, then stir until everything is just combined – do not over mix.
Bake for 25-30 minutes
Using a spatula if you have one, pour the brownie mix into your prepared tin, and bake for 25 to 30 minutes. If you prefer ‘spongey’ brownies to ‘fudgey’ ones, you can bake for a little longer.
Optional: cover with melted chocolate
These brownies taste great with a thin layer of chocolate on the top. To get a really thin layer, pour some grated chocolate all over the brownies immediately after taking them out of the oven, then spread slightly as it melts. Alternately, you can just melt some chocolate and pour over the brownies.
Leave to cool, then cut into pieces
Allow the brownie tin to cool for at least one hour before cutting into slices – otherwise they will be a little TOO gooey to cut properly. Leave the brownies on a wire rack to cool completely.

And here they are in all their glory...

Chocolate brownies: - fills a 10x7.5 inch pan
100g dark chocolate
100g butter/margarine
200g caster sugar
160g self-raising flour
2 small eggs, beaten

  1. Preheat oven to 180°C
  2. Melt together the chocolate and butter in the microwave, in short 30-second bursts
  3. Add the sugar, flour and eggs, then mix until smooth (do not overmix)
  4. Pour into a lined tin and bake for 25 to 30 minutes
  5. Leave to cool for at least an hour before slicing


Sunday, 7 July 2013

Hummingbird Banana Loaf

This banana loaf is really moist, really sponge-y and not too banana-y. It’s perfect on its own, but you could also add a handful of walnuts, pecans or chocolate chips. It’s a great recipe for many reasons – it’s one way to use up old bananas (the riper they are, the better), it’s really simple to make and it’s even easier to transport. The quantities here would probably fill one large loaf tin but mine are small so I split it into two. 

Makes 2 small banana loaves 

Gather your equipment
Essential equipment:  lined loaf tin, scales, small bowl, big bowl, mixing spoon, smaller spoon, fork, measuring spoons
Optional equipment: electric whisk, spatula
  • Unless you have special cake tin liners, line your tin with greaseproof paper. Sometimes all you need is a rectangular piece of greaseproof paper in the base of the tin, and oil/butter for the sides.
Gather your ingredients
For this recipe you'll need: 270g brown sugar, 2 eggs, 200g peeled bananas, 280g plain flour, 140g butter/margarine and 1tsp each of: cinnamon, ginger, bicarbonate of soda and baking powder
Optional: 50-100g chopped walnuts, 75g chocolate chips (or more if you want!)
  • The riper the bananas, the better. I mean it - the kinds of bananas that are absolutely horrible to eat are perfect for this recipe.
Prepare to bake
Preheat oven to 170°C and line your cake tins if you haven’t already. Finely mash your bananas in the bowl, using a fork.
Mix sugar and eggs
Mix the sugar and eggs in the big bowl, using a fork, and making sure all the lumps of brown sugar have been separated. Use an electric whisk if you have one.
Add mashed banana
Stir in the mashed banana; don’t worry if there are still some banana-y lumps.
Melt butter
Melt your butter in the same bowl used for the banana. I do this via short bursts in the microwave, alternatively you could do this in a small saucepan over a gentle heat.
Add flour, spices and raising agents
Add your flour, ginger, cinnamon, bicarbonate of soda and baking powder all at once to the sugar/eggs/banana bowl and stir until incorporated.
Add the melted butter
Immediately add the melted butter and stir in (doesn’t the middle picture just look SO appetising?!).
Bake
Spread into your cake tins and bake for 55-60 minutes. When it’s ready it should be firm to the touch, and a skewer/toothpick inserted in the centre should come out clean. Leave them to cool slightly in the tin, then remove and allow to cool completely before slicing.

And here's one banana loaf all sliced up and ready to go... I finished slicing this one, put it back together and wrapped it in tin foil to bring with me to the office. It went down well! Then again I don't know many people who would turn down free cake.


Hummingbird banana loaf: - fills two small loaf tins
270g soft light brown sugar
2 eggs
200g peeled bananas, mashed
280g plain flour
1tsp baking powder
1tsp bicarbonate of soda
1tsp ground cinnamon
1tsp ground ginger
140g butter/margarine, melted

  1. Preheat oven to 170°C
  2. Beat together the sugar and eggs. Add the mashed bananas and stir well
  3. Add the flour, spices, baking powder and bicarbonate of soda, stir thoroughly
  4. Pour in the melted butter, beat until everything is well incorporated
  5. Pour into lined loaf tins, bake for roughly 1 hour until the cake is firm to the touch. Leave to cool in the tin for a while, then turn out

Recipe originally from: The Hummingbird Bakery Cookbook